Miche Primato Evo Light
parts, tools and installation hints
Preliminary Remarks
The
Miche-Primato-Evo Light bottom bracket is a good one, but the
installation can be more tricky than with other (cartrige-)BB's.
(Therefore
- depending on some conditions - outside a really good workshop the
proper installation could become risky up to impossible!)
Spindle (axle), bearings
and shells may be more or less easily separable one from another
(this variation seems normal for this type of bottom bracket).
Separated parts should be clean and greased before reconnection.
Even thin corrosion films may hinder easy reinstallation.
If
(deep groove ball) bearings are separated from the shells, press them back into the shell.
Make sure that they are not canted, while pressing them back.
Canted bearings must be removed from BB-shell and proper reinstalled (pressed back into the BB-shells).
Hammer strokes may
damage the bearings, use a workshop press instead.
You
also may need some suited pieces of metall and wood to orthogonally
position, hold or press parts while pressing in or out.
The bearings should
come to their end position inside the BB-shells.
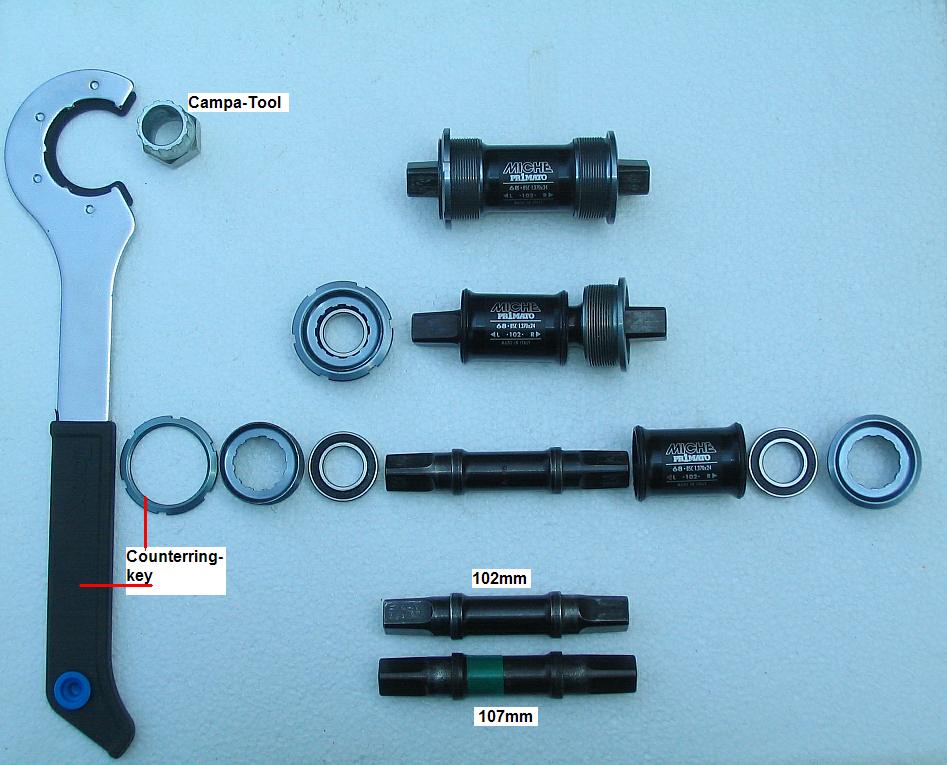
Proper Tools:
The
(rather expensive ~15Euro) counterring key is needed. A quite similar tool for
older (steel) counterrings will not work (is a little to big) with the Miche ring.
(The Miche counterrings outer diameter is 43,0mm, the gaps are 5,0mm long and 1,7mm deep [gap to gap diameter is 40,5mm])
The alternativ use of a hook-wrench may also be possible - but will probably spoil the counterring.
(Alternatively it may also be possible [though certainly non ideal] to use older (steel) counterrings together with older tools on the Miche-BB.
But this may damage the thread of the softer aluminium bb-shell.)
Also the campa-BB-tool is needed. This tool is very similar to the Shimano cassette tool. Make sure to use the right tool.
Preparations - (Frame bush thread check - may be skipped)
Step 1
Carefully check, that all threads (BB-shells and frame bush) are clean. Grains of sand can prevent proper installation!
Step 2
With
some grease fully skrew in separately the right and the left BB-shell,
only to make sure, that the threads of the frames BB-bush are cut well.
If
the BB-shell's can not be screwed into the frame bush reasonable easily, ask
your lokal dealer to recut the frames BB threads for you.
(Cutting
the frame bush's right and left threads has to be done very carefully.
A wrong cutting of these threads means really and figuratively screwing the frame!)
Installation - (with the axle inside one of the shells)
Step3
- Screw in... Right shell to 50%
- ~ Left shell to 50%
- ~ Right shell to 100%
- ~ Left shell to 100%
- Now use the counterring tool for tightening of the left BB-shells counterring.
- The axle should be turnable very easily - (if not - uncounter and loosen the left BB-shell a bit before recountering)
* * *